

Authentication
Control who can open your Keboola app, including how to set up OIDC with Auth0, Google Cloud, Microsoft Entra ID, or Okta.
Once an app is deployed, its URL is publicly available. Protect it so only the right people can open it, and choose the method that fits your audience. You set it in the app’s configuration under Authentication → Authentication Type, which offers six options.
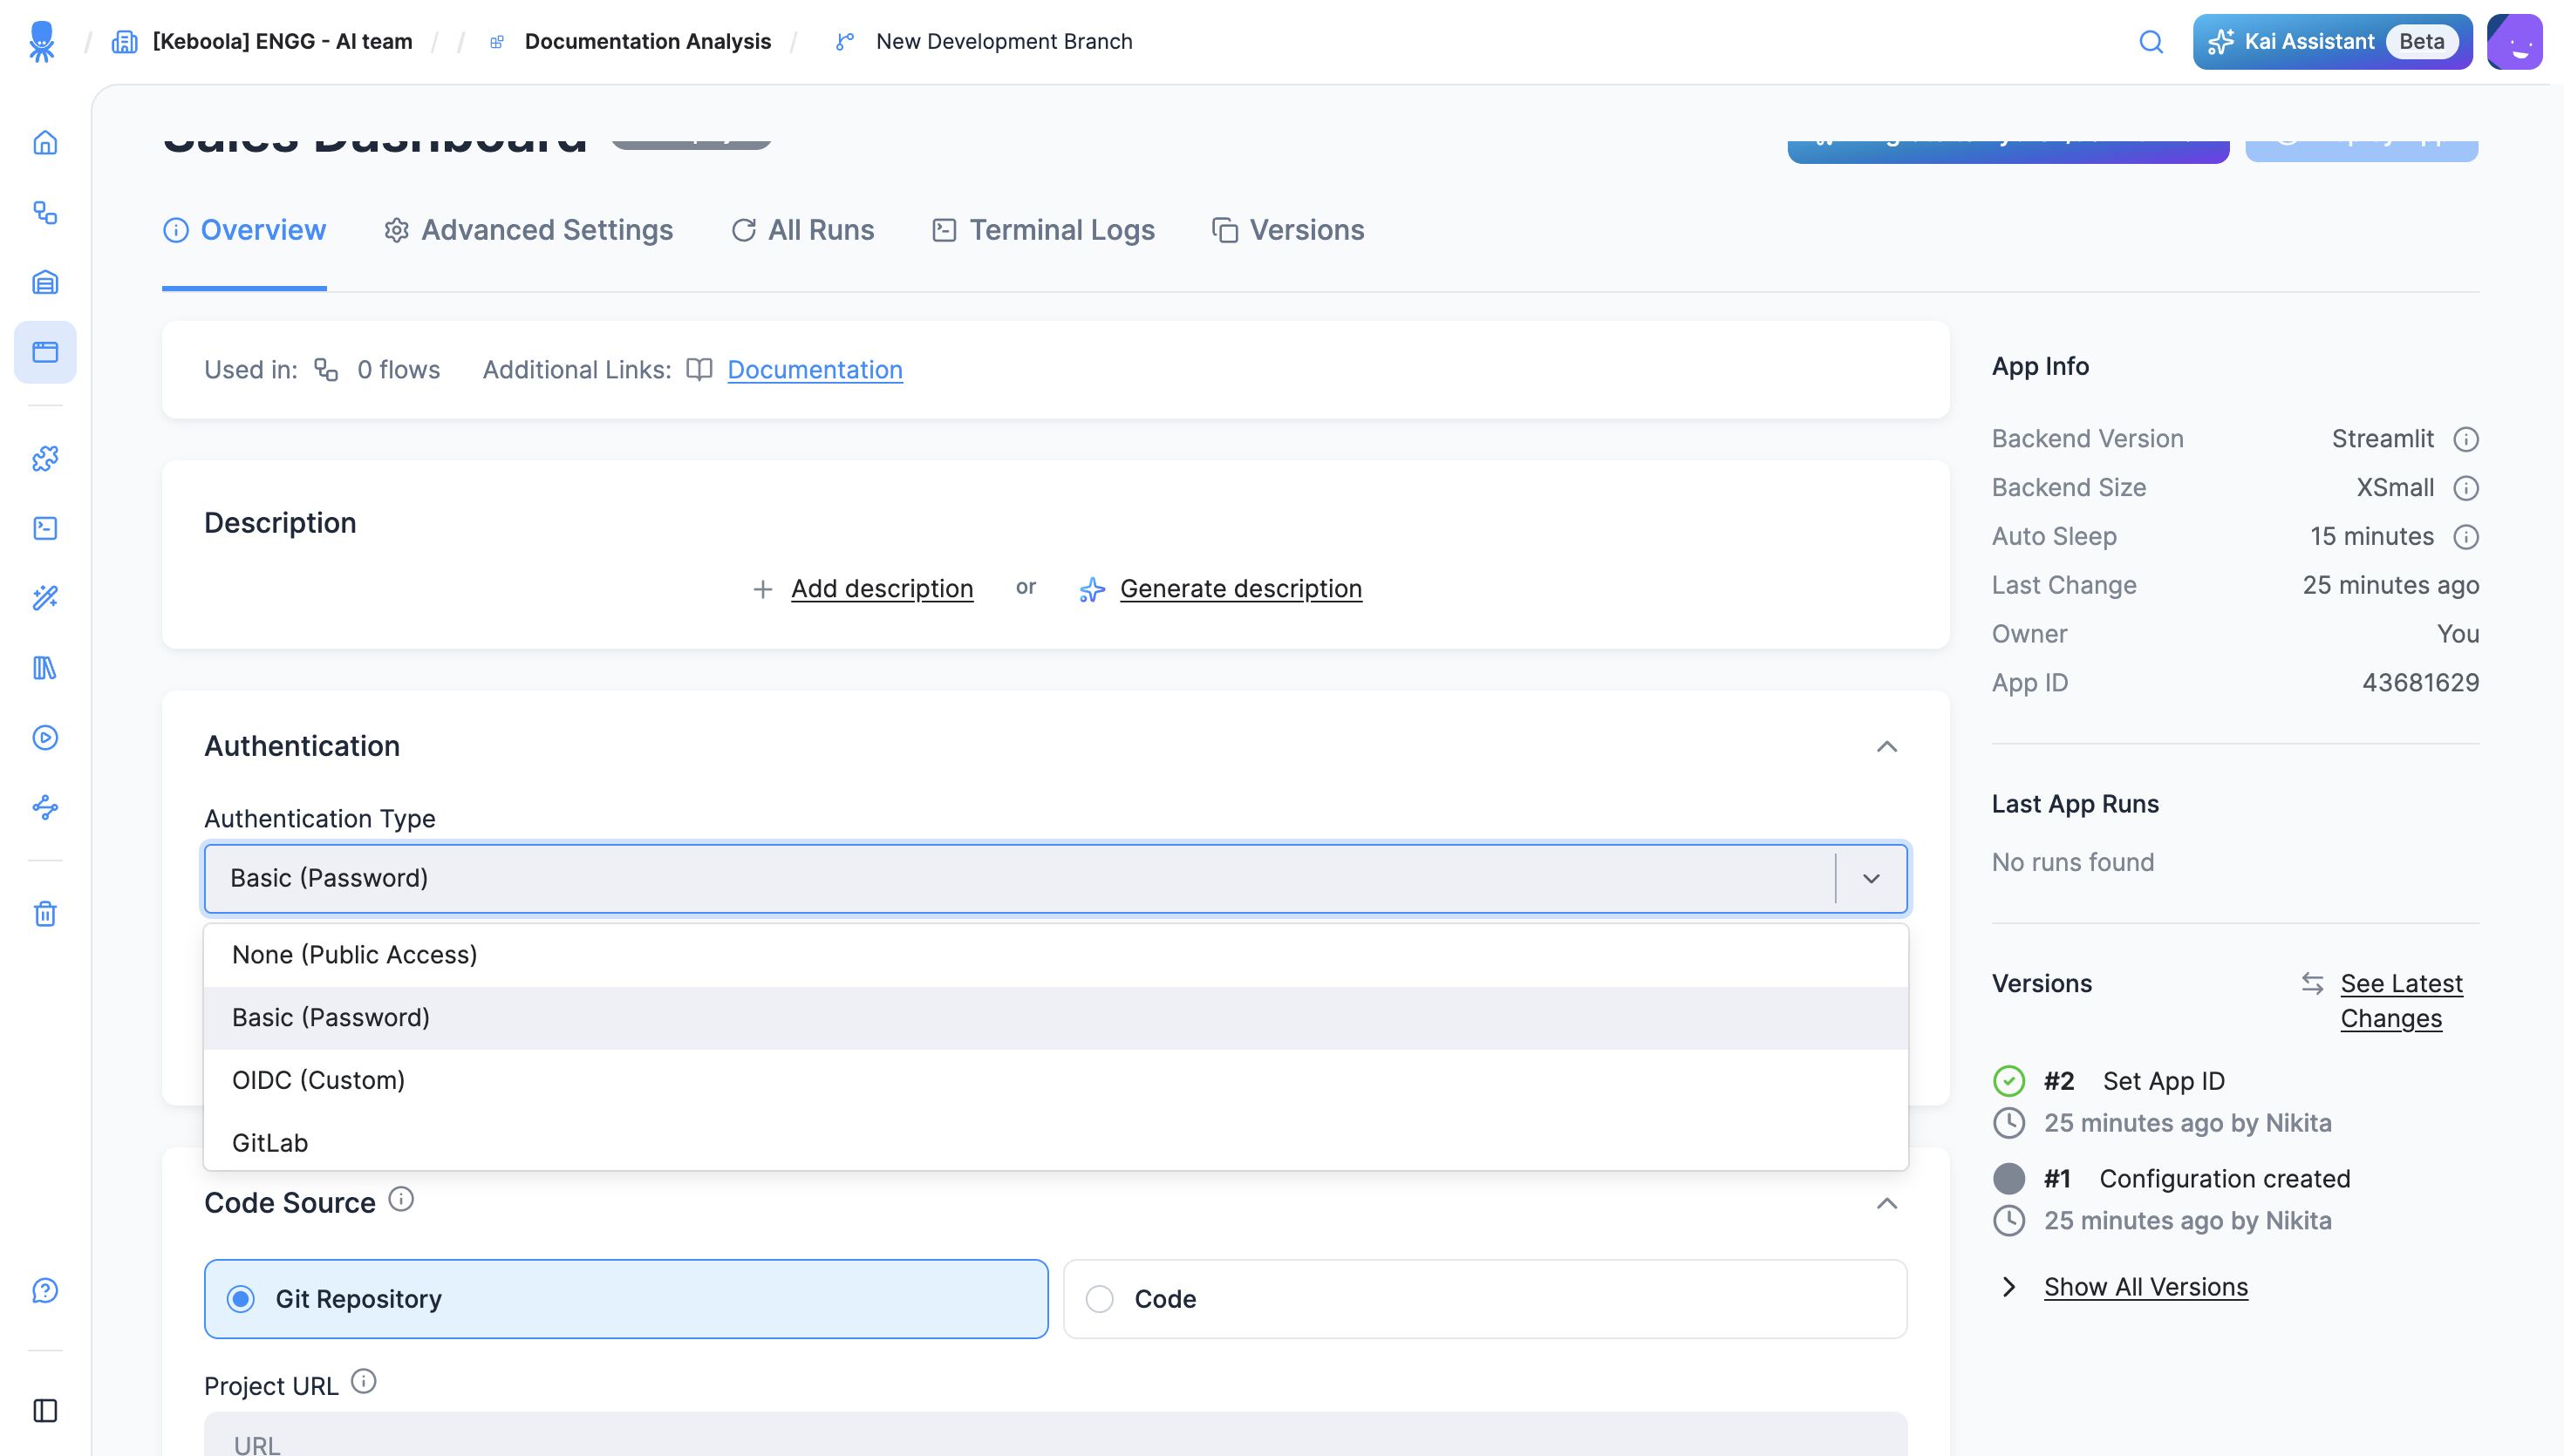
Authentication methods
Section titled “Authentication methods”- None (Public Access) — the app is public to anyone with the URL. You can still add your own authorization inside the app; for Streamlit, use the Streamlit authenticator (example).
- Basic (Password) — a shared password generated by Keboola. Users enter it before the app opens. Quick for internal sharing.
- OIDC (Custom) — users sign in with your identity provider (Auth0, Google Cloud, Microsoft Entra ID, Okta). Recommended for anything beyond a quick share.
- GitHub — restrict access with GitHub OAuth by organization, team, repository, or allowed users.
- GitLab — restrict access with GitLab OAuth by groups, projects, or roles.
- JumpCloud — restrict access with JumpCloud OIDC, with optional role-based filtering.
OIDC (single sign-on)
Section titled “OIDC (single sign-on)”OIDC lets users log into your app through your single sign-on (SSO) provider. Keboola supports Auth0, Google Cloud, Microsoft Entra ID, and Okta. When you open an OIDC-protected app, you pick an Authentication Provider and sign in.
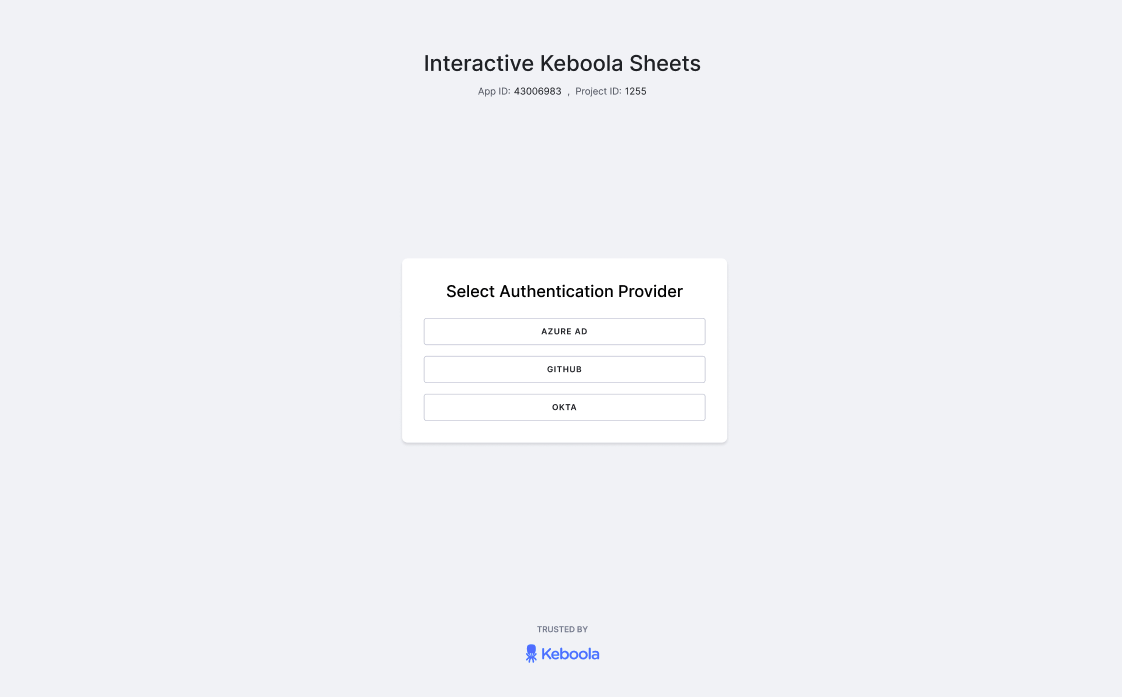
Set up OIDC
Section titled “Set up OIDC”The flow is the same for every provider — only the provider option, issuer URL, and a few provider quirks differ (see the table below). You must register a callback URL for each app; credentials can’t be reused across apps.
- Register the app with your identity provider. Create an OIDC / OAuth 2.0 web application in the provider’s console. You’ll get a Client ID and Client Secret. Leave the callback URL for now — you don’t have it until the Keboola app exists.
- Create the app in Keboola. Open Apps, click the green +, name it, and click Create App.
- Set the authentication method. In the app’s Information & Settings tab, under Authentication, select OIDC, choose your provider option, and paste the Client ID, Client Secret, and Issuer URL. Click Save.
- Add the callback URL to your provider. Register the app’s callback URL as the authorized redirect URI in the provider’s console.
- Deploy the app. In the Deploy App tab, choose the Code or GitHub deployment type, add your code, and click Deploy App.
- Test. Open the app URL — you should be redirected to your provider to sign in, then land in the app.
Provider settings
Section titled “Provider settings”| Provider | Keboola provider option | Issuer URL | Notes |
|---|---|---|---|
| Auth0 | Generic OIDC | https://<yourDomain>.us.auth0.com/ | Register a regular web application. |
| Google Cloud | Google SSO | https://accounts.google.com | On the OAuth consent screen, add keboola.com under Authorized domains. |
| Microsoft Entra ID | Azure OIDC | (from your tenant) | Provide Client ID, Client Secret, and Tenant ID. To restrict by group, add a groups claim (Manage → Token configuration → Add groups claim; for large tenants, return only groups assigned to the app). |
| Okta | Generic OIDC | https://<yourOktaOrg>.okta.com/oauth2/default | Register an OIDC – OpenID Connect web app. |
GitHub authentication
Section titled “GitHub authentication”Restrict access to your app using GitHub OAuth. Users authenticate via their GitHub account, and you can optionally restrict access to specific organizations, teams, repositories, or individual users.
Required fields
Section titled “Required fields”| Field | Description | Example |
|---|---|---|
| Client ID | Client ID from GitHub Developer Settings > OAuth Apps. | Ov23liABCDEF123456 |
| Client Secret | Client Secret from the same GitHub OAuth App. | (paste your GitHub secret) |
Optional fields
Section titled “Optional fields”| Field | Description | Example |
|---|---|---|
| GitHub URL | Your GitHub Enterprise Server URL. Leave empty for public GitHub. | https://github.com |
| Organization | URL slug of your GitHub organization. Restricts access to organization members. | my-company |
| Team | URL slug of the team within the organization. Requires Organization to be set. | data-engineers |
| Repository | Restrict to repository collaborators. Format: owner/repo-name. | my-company/analytics |
| Access Token | Required for private org/team/repo restrictions. Needs read:org scope. Generate at GitHub > Settings > Developer Settings > Personal Access Tokens. | ghp_... |
| Allowed Users | Comma-separated GitHub usernames. If set, only these users can log in. | jane-smith, john-doe |
Setup instructions
Section titled “Setup instructions”- Go to your GitHub account Settings > Developer Settings > OAuth Apps and create a new OAuth App.
- Set the Authorization callback URL to:
https://<dataAppId>.hub.<keboolaConnectionHost>/_proxy/callback(e.g.,https://my-app-12345678.hub.north-europe.azure.keboola.com/_proxy/callback). - Copy the Client ID and Client Secret from the created OAuth App.
- In your Keboola app configuration, select GitHub as the authentication method.
- Paste the Client ID and Client Secret.
- Optionally configure organization, team, repository, or allowed users restrictions.
- If you use organization, team, or repository restrictions with a private organization, provide an Access Token with
read:orgscope. - Save and redeploy your app.
GitLab authentication
Section titled “GitLab authentication”Restrict access to your app using GitLab OAuth. Users authenticate via their GitLab account, and you can optionally restrict access by groups, projects, or roles.
Required fields
Section titled “Required fields”| Field | Description | Example |
|---|---|---|
| Client ID | Application ID from GitLab > Settings > Applications. | a1b2c3d4e5f6... |
| Client Secret | Application secret from the same GitLab application. | gloas-xxxxxxxxxxxxxxxxxxxxxxxxxxxx |
| GitLab Instance URL | Use https://gitlab.com for public GitLab, or your self-hosted URL. | https://gitlab.com |
Optional fields
Section titled “Optional fields”| Field | Description | Example |
|---|---|---|
| Groups | Only members of these groups can access the app. Use the URL path, not the display name. Separate multiple groups with commas. | my-org/data-team |
| Projects | Restrict access to members of these projects. Format: namespace/project-slug. | my-org/analytics-app |
| Allowed Roles | Leave empty to allow any role. Valid values: guest, reporter, developer, maintainer, owner. | developer, maintainer |
Setup instructions
Section titled “Setup instructions”- Go to your GitLab instance Settings > Applications and create a new application.
- Set the Redirect URI to:
https://<dataAppId>.hub.<keboolaConnectionHost>/_proxy/callback(e.g.,https://my-app-12345678.hub.north-europe.azure.keboola.com/_proxy/callback). - Ensure the
openid,profile, andemailscopes are selected. If you use group or project restrictions, also selectread_api. - Copy the Application ID and Secret.
- In your Keboola app configuration, select GitLab as the authentication method.
- Paste the Client ID, Client Secret, and GitLab Instance URL.
- Optionally configure groups, projects, or allowed roles restrictions.
- Save and redeploy your app.
JumpCloud authentication
Section titled “JumpCloud authentication”Restrict access to your app using JumpCloud OIDC. Users authenticate via their JumpCloud account, and you can optionally restrict access by roles.
Required fields
Section titled “Required fields”| Field | Description | Example |
|---|---|---|
| Client ID | Client ID from JumpCloud Admin Console > SSO > your app. | 6507c80f5f2b490a... |
| Client Secret | Client Secret from JumpCloud Admin Console > SSO > your app > SSO tab. Treat like a password. | (paste your JumpCloud secret) |
| Issuer URL | Pre-filled. For custom tenants, ask your JumpCloud admin for the correct issuer URL. | https://oauth.id.jumpcloud.com/ |
| Logout URL | Pre-filled. Change only if your JumpCloud admin provides a different logout endpoint. | https://oauth.id.jumpcloud.com/oauth2/sessions/logout |
Optional fields
Section titled “Optional fields”| Field | Description | Example |
|---|---|---|
| Allowed Roles | Role values must match exactly what is set in JumpCloud’s attribute mapping. Leave empty to allow any authenticated user. | data-analyst, admin |
Setup instructions
Section titled “Setup instructions”- In the JumpCloud Admin Console, go to SSO and create a new application (or use an existing one).
- Configure the application as an OIDC application.
- Set the Redirect URI to:
https://<dataAppId>.hub.<keboolaConnectionHost>/_proxy/callback(e.g.,https://my-app-12345678.hub.north-europe.azure.keboola.com/_proxy/callback). - Copy the Client ID and Client Secret from the SSO tab.
- In your Keboola app configuration, select JumpCloud as the authentication method.
- Paste the Client ID, Client Secret, Issuer URL, and Logout URL.
- Optionally configure allowed roles to restrict access.
- Save and redeploy your app.
Callback URL format
Section titled “Callback URL format”All authentication methods that use OAuth or OIDC require a callback URL. The format is always:
https://<dataAppId>.hub.<keboolaConnectionHost>/_proxy/callbackFor example: https://my-app-12345678.hub.north-europe.azure.keboola.com/_proxy/callback
You can find your app’s full URL after the first deployment in the app configuration.